Quick Answer: To get rid of red mites, you need to attack them on two fronts at once — deep-clean and treat the coop structure, then treat your birds directly. Red mites hide in coop crevices during the day and only come out to feed at night, so treating the birds alone won’t work. Because most treatments don’t kill mite eggs, repeat applications 7–10 days apart are essential.
Red mites (Dermanyssus gallinae) are one of the most frustrating problems a backyard keeper can face. If you’re trying to figure out how to get rid of red mites, you’ve probably already noticed something is wrong — pale combs, restless hens at dusk, or a sudden drop in egg production. The good news is that with a methodical approach, you can eliminate an infestation and keep it from coming back.
What Are Red Mites and How Do You Know You Have Them?
What Red Mites Look Like
Red mites are tiny — about 0.7–1 mm, roughly the size of a pinhead. Before feeding, they’re grayish-white and easy to miss. After a blood meal, they turn bright to dark red, which is usually when keepers first spot them. They’re arachnids, closely related to spiders and ticks.
What makes them especially tricky is their behavior. Unlike Northern Fowl Mites, which live permanently on the bird, red mites spend their days hiding in the coop — in cracks, under roost bars, inside nesting box joints — and only crawl onto your hens at night to feed.
Signs of Red Mites on Your Chickens
- Pale comb and wattles (a sign of anemia from blood loss)
- Restlessness at dusk; hens reluctant to enter the coop
- Feather loss around the vent, under wings, or on the breast
- Weight loss despite eating normally
- Hens roosting on the ground rather than on the bars
- Decreased egg production
Signs of Red Mites in Your Coop
- White or grayish powder near roost bar ends and crevices (mite eggs and shed skins)
- Rust-red or dark streaks in joints and cracks — engorged mites or their droppings
- Tiny moving specks visible in crevices when you check at night with a flashlight
The White Paper Towel Test
This is the simplest and most reliable DIY diagnostic. After dark, run a white paper towel firmly along the underside of your roost bars. If you see small red or rust-colored smears, you have red mites. No ambiguity, no guessing.
The Red Mite Life Cycle: Why Repeat Treatments Are Non-Negotiable
In warm conditions — 77–86°F (25–30°C) — red mites complete their entire life cycle in as little as seven days. Eggs hatch within 2–3 days, and larvae develop through two nymph stages before reaching reproductive adulthood. A small population can become a serious infestation within weeks.
Here’s the detail most keepers miss: nearly every treatment available — permethrin, diatomaceous earth, spinosad — kills live mites effectively but does nothing to the eggs. You treat the coop, knock back the adult population, and then 2–3 days later a fresh wave of newly hatched mites emerges. A second application at 7–10 days isn’t optional; it’s the whole strategy.
Adult red mites can also survive up to nine months without feeding, hiding in coop crevices and waiting for the right conditions. This is why leaving the coop empty and hoping they die off simply doesn’t work.
Infestations peak in late spring through early fall when temperatures are consistently above 65°F (18°C). In insulated coops or warm climates, mites can reproduce year-round — making summer a double burden, since it’s peak mite season and peak laying season simultaneously.
How to Get Rid of Red Mites: Step-by-Step Treatment Protocol
Step 1: Remove Your Birds Temporarily
Move your flock to a clean temporary space — a dog crate, a spare run, or a tarp-covered pen — while you treat the coop. This isn’t always possible, but it makes every subsequent step more effective and allows treatments to dry fully before birds return.
Step 2: Deep Clean the Coop
Remove all bedding and nesting material and bag it for disposal away from your property. Then pressure wash every surface at a minimum of 1,500 PSI, focusing on roost bar undersides and ends, nesting box corners and joints, wall-floor junctions, and any visible cracks or gaps. Let the coop dry completely before applying any treatment — wet surfaces dramatically reduce the effectiveness of most products.
Step 3: Apply Your Coop Treatment
You have several solid options depending on the severity of the infestation and your preferences.
Diatomaceous Earth (DE): Food-grade DE works mechanically, damaging mites’ exoskeletons and causing them to dehydrate. Dust it liberally into all cracks, crevices, and along roost bar surfaces. It’s a reasonable choice for light infestations but loses effectiveness when wet, so reapply after any moisture. Always wear an N95 mask when applying — the fine particles are hard on lungs. A bag of Harris Food Grade Diatomaceous Earth works well for this.
Permethrin Spray: A 0.05–0.5% permethrin solution is one of the most effective and accessible treatments available. Spray all coop surfaces, focusing on harborage areas, and allow to dry fully before returning birds. Repeat in 7–10 days. Important: permethrin is highly toxic to cats — keep them away from treated areas until completely dry. Gordons Permethrin 10% is a widely used option that can be diluted to the correct concentration.
Spinosad Products: Naturally derived and lower in mammalian toxicity than synthetic pyrethroids, spinosad-based sprays and dusts are a good middle-ground option. Follow label directions and repeat in 7–14 days.
Steam Treatment: Red mites die at temperatures above 122°F (50°C). A steam cleaner delivers lethal heat directly into crevices without chemical residue — ideal for organic operations or households with cats. The McCulloch MC1275 Heavy-Duty Steam Cleaner is a popular choice for this purpose.
Predatory Mites (Biological Control): Species like Hypoaspis miles are natural predators of red mites and are used successfully in commercial European operations. They’re more expensive and require careful application, but they work well as part of an integrated pest management approach.
Step 4: Treat Your Chickens Directly
Even after a thorough coop treatment, mites already on the birds need to be addressed — don’t skip this step.
Permethrin or Pyrethrin Dust: Part the feathers and apply poultry dust directly to the skin, focusing on the vent area, under the wings, and around the neck. Repeat in 7–10 days. Wear gloves and a mask. Durvet Permethrin Poultry Dust is a readily available option.
Ivermectin: Administered topically (spot-on behind the neck) or orally at 0.2 mg/kg body weight. Highly effective — mites that feed on treated birds die. Note the 14-day egg withdrawal period and consult your vet for dosing, especially with bantams. Regulations vary by country.
Fluralaner (Exzolt): A prescription veterinary treatment delivered in drinking water with 99%+ efficacy in studies. Increasingly available through avian vets for backyard flocks. Confirm the egg withdrawal period with your veterinarian before use.
Dust Baths: Make sure your hens always have access to a dry dust bath. A good mix is equal parts fine dirt, sand, and wood ash with food-grade DE added in. This is a natural mite-control behavior and genuinely helps maintain flock health between treatments.
Step 5: Refresh Bedding and Monitor Weekly
Add fresh, dry bedding — pine shavings are preferable to straw, which harbors mites more readily. Run the white paper towel test weekly. If mites are still detected after 2–3 weeks, repeat the full protocol from Step 2.
How Red Mites Affect Egg Production and Flock Health
A moderate-to-severe infestation can reduce egg production by 20–40%. A healthy Rhode Island Red typically lays around 5–6 eggs per week. Under heavy mite pressure, that same hen may drop to 3–4 eggs per week — or stop entirely. Buff Orpingtons, which are moderate layers at roughly 3–4 eggs per week, can cease laying altogether when mite stress is significant.
Beyond quantity, blood loss affects egg quality too. Expect paler yolks, thinner shells, and irregular laying patterns.
If mites are concentrated in nesting boxes — which is common, since hens sit still there for extended periods — hens will start avoiding them. You may find eggs on the coop floor or in odd corners. This isn’t a behavioral problem; it’s your hens telling you exactly where the infestation is worst.
Broody hens are especially vulnerable. A hen sitting on a clutch for 21 days is essentially stationary in a mite hotspot. She can accumulate a dangerously heavy mite load in a short time. Check broody hens daily, parting feathers to inspect the vent and breast area, and treat immediately if mites are found.
Once mites are controlled and nutrition is restored, most hens resume normal laying within 2–4 weeks.
Nutrition for Mite-Stressed Chickens
Blood loss puts significant nutritional stress on your flock. Temporarily switch to a flock raiser or grower feed with 18–20% protein to support blood cell regeneration and feather regrowth. Standard layer feed sits at around 16% protein, which isn’t enough during recovery.
Good high-protein supplements during this period include mealworms (up to 1 tablespoon per bird per day), black soldier fly larvae, scrambled eggs offered 2–3 times per week, and black oil sunflower seeds. Keep all treats under 10% of total daily diet — even during recovery, too many extras can throw off nutrient balance.
Blood loss also disrupts calcium metabolism, leading to soft or thin-shelled eggs. Offer oyster shell free-choice at all times rather than mixing it into feed — let hens self-regulate their intake. Ensure constant access to clean, fresh water, and add a second waterer if temperatures climb above 85°F (29°C). A reliable poultry waterer like the Harris Farms 5-Gallon Plastic Poultry Waterer makes it easy to keep multiple water stations topped up.
Coop Design to Prevent Red Mites
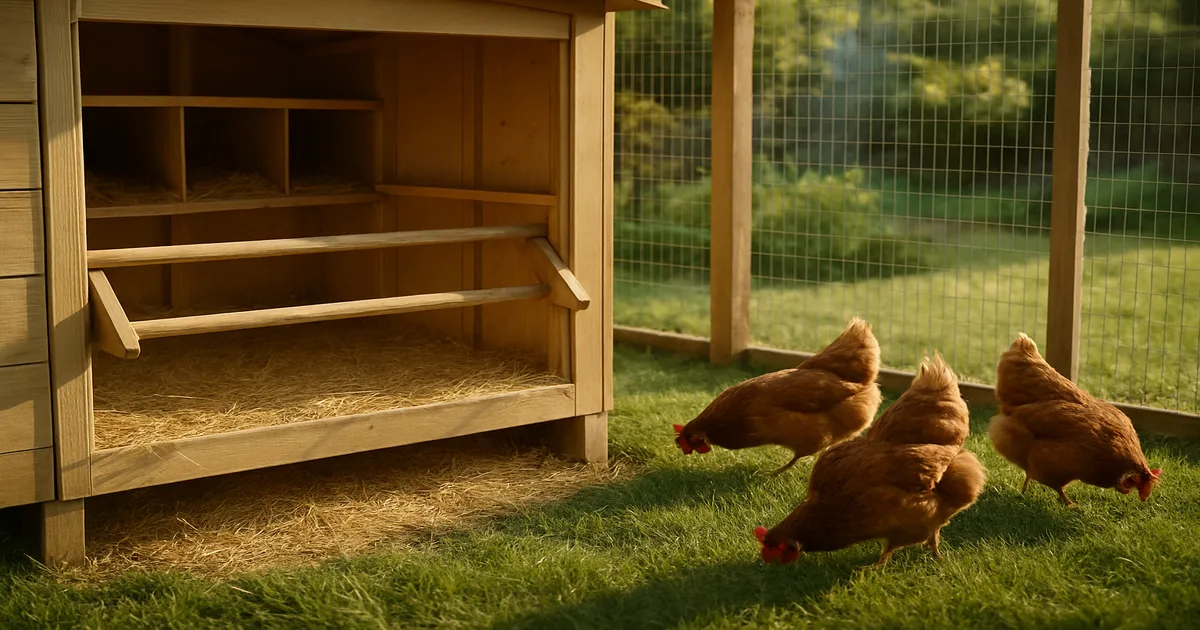
The best long-term defense against red mites is a coop that gives them nowhere to hide. Use smooth hardwood roost bars, 1.5–2 inches in diameter for standard breeds, and make them removable for thorough cleaning. Rough or splintered wood is a mite hotel. Some keepers add leg cups filled with food-grade DE or oil at the base of roost supports — mites must cross these to reach the birds.
For nesting boxes, use removable, washable nesting pads rather than fixed loose straw. Inspect nesting box corners and joints weekly; they’re prime real estate for red mites. Aim for one nesting box per 3–4 hens, with internal dimensions of at least 12” × 12” × 12” for standard breeds.
Seal all interior cracks and joints with caulk annually — red mites can squeeze through gaps as small as 0.5 mm. Avoid rough-sawn lumber on interior surfaces, which is nearly impossible to clean thoroughly. Smooth, painted, or sealed wood is far better, and plastic or metal components for roost bars and nesting boxes eliminate harborage almost entirely.
High humidity accelerates mite egg hatching, so aim for interior humidity below 60–70%. Provide at least 1 square foot of ventilation per 10 square feet of coop floor space, with vents mounted high on walls or in the eaves so air moves through without creating cold drafts on roosting birds.
Finally, wild birds — particularly sparrows and starlings — are the primary way red mites enter a backyard flock. Cover all vents and openings with ½-inch hardware cloth (not standard chicken wire, which has gaps wide enough for small birds to enter). Keep feeders inside the coop or in areas inaccessible to wild birds.
Frequently Asked Questions About How to Get Rid of Red Mites
Can red mites live on humans?
Red mites can bite humans and cause skin irritation, but they cannot establish themselves on a human host — they need birds to complete their life cycle. If you’re getting bites after working in an infested coop, treat the coop promptly. The mites aren’t living on you, but they will opportunistically feed when you’re nearby.
How long does it take to get rid of red mites?
With a thorough protocol — deep cleaning followed by two rounds of treatment 7–10 days apart — most infestations are under control within 3–4 weeks. Severe infestations or missed follow-up treatments can extend this timeline. Weekly monitoring with the paper towel test will tell you whether the population is declining.
What kills red mites instantly?
Steam and direct heat above 122°F (50°C) kill red mites on contact, including those deep in crevices. Permethrin spray also kills live mites quickly on treated surfaces. The catch with any fast-acting treatment is that it doesn’t kill eggs, so eliminating an entire infestation still requires that second application 7–10 days later.
Can chickens die from red mites?
Yes, in severe cases. Heavy infestations cause significant blood loss, leading to anemia, weakness, and — particularly in chicks, bantams, and elderly birds — death. Pale combs, extreme lethargy, and labored breathing are warning signs that require immediate action.
Do red mites survive winter?
They can. Adult red mites survive up to nine months without feeding, waiting out cold periods in coop crevices. In insulated coops or warm climates, they may continue reproducing through winter at a slower pace. Don’t assume a cold snap has solved your problem — inspect the coop year-round and treat if mites are detected.